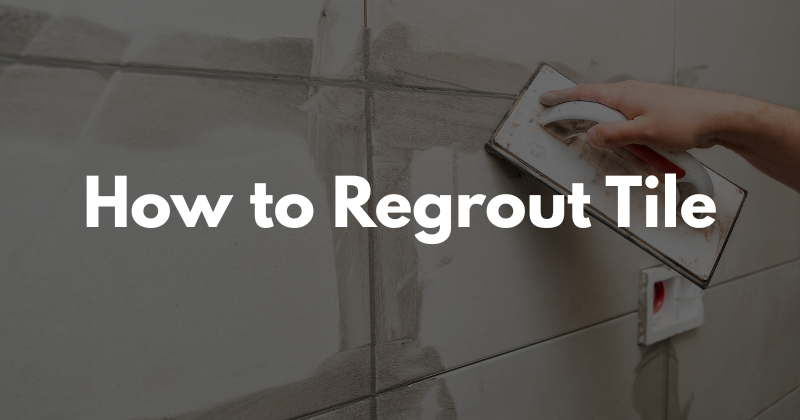
See those lines between your tiles? Are they looking gross?
Maybe cracked, or just plain dirty? That’s a problem. Old grout gets ugly.
And it’s not just looks. Water can sneak in, and mold can grow. Yuck!
Imagine your bathroom floor falling apart. Or water leaking behind your kitchen tiles. That’s a mess!
But don’t worry. You can fix it!
We’ll show you how to regrout your tile step by step. It’s easier than you think.
Let’s make those tiles look brand new again!
The Basics
Okay, so you want to fix your tile. First, you need to know a little about what you’re working with.
Think of tile grout as the stuff that holds your tiles together. It fills those little spaces between the tiles.
But, over time, grout gets old and breaks down. Why?
Well, water can get in, or it might just wear out. You’ll know it’s time to regrout when you see:
- Cracks or chunks missing.
- Weird colors or mold spots.
- Water damage around the tiles.
Now, there are different kinds of grout. You need to pick the right one.
Some are sandy, some are smooth, and some are super strong. You also need the right tools. Here’s a quick list:
- To remove the old grout, you’ll need a grout removal blade. It’s like a tiny scraper.
- A sponge and bucket for cleaning.
- A grout float to spread the new grout.
- And, very importantly, grout sealer to protect your work after it is done.
When you are thinking about this project, it is also important to consider the tile surface itself.
Understanding how to install porcelain tile would also be helpful if you are doing a new installation.
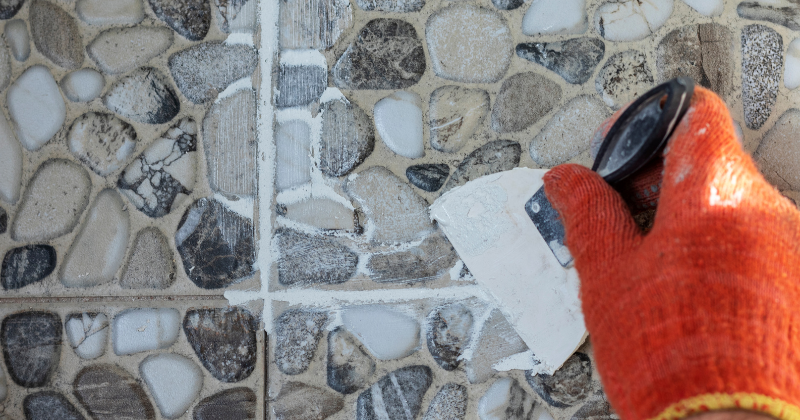
During the process, you may find that you have excess grout that needs to be removed.
And if you don’t clean it up right, you’ll get a white film called grout haze. We’ll cover how to fix that later.
Step-by-Step Regrouting Process
Alright, let’s get into the nitty-gritty of how to regrout your tile.
It’s not as hard as it looks, trust me!
- Step 1: Preparing the Area
- First, move anything that’s in the way. You don’t want to get grout on your stuff.
- Clean the tiles really well. Any dirt left behind will mess up your new grout.
- Open a window or turn on a fan. You don’t want to breathe in a bunch of dust.
- Step 2: Removing the Old Grout
- This is the messy part. You’ll need your manual grout removal tool or an electric one if you have one.
- Carefully scrape out all the old grout. Get it all out, even the tiny bits.
- Be careful not to scratch your tiles! Especially if you have natural stone flooring, which can scratch easily.
- Get all of the existing grout out of the grout lines.
- Step 3: Cleaning and Preparing for New Grout
- Vacuum up all the dust and little pieces of grout.
- Wipe the tiles down with a damp sponge. You want them clean and dry.
- Look for any cracks in the tiles. Fix those before you add new grout.
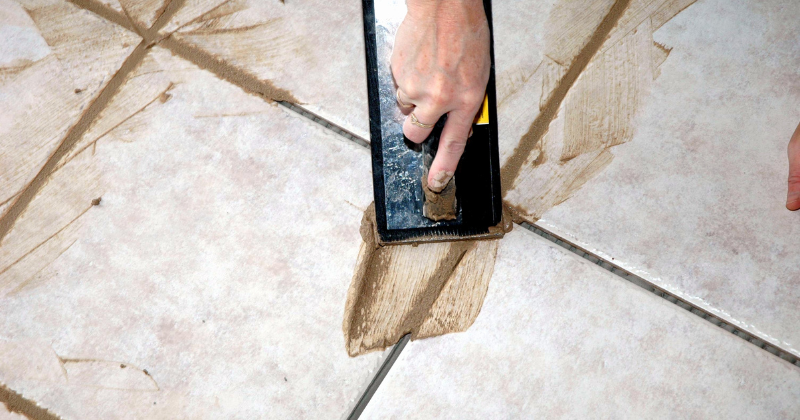
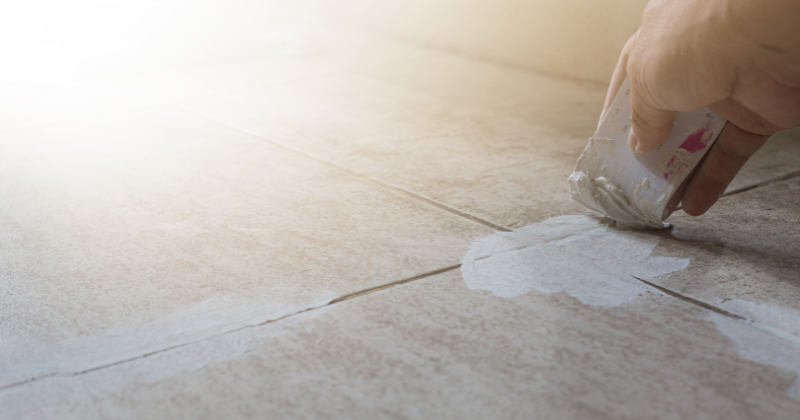
- Step 4: Mixing and Applying the New Grout
- Mix your tile grout according to the directions on the package. It should be like thick peanut butter.
- If you are using sanded grout, make sure it is mixed very well.
- Use your grout float, held at an angle, to push the grout into the gaps between the tiles.
- Make sure you fill all the grout lines.
- Work in small sections. Grout dries fast, so you don’t want it to harden before you’re done.
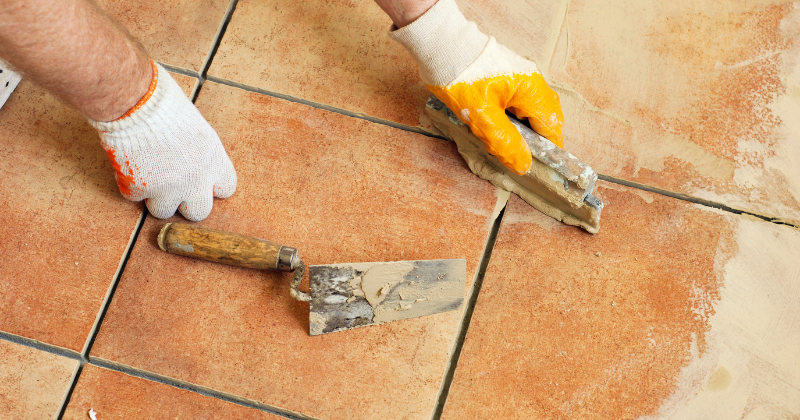
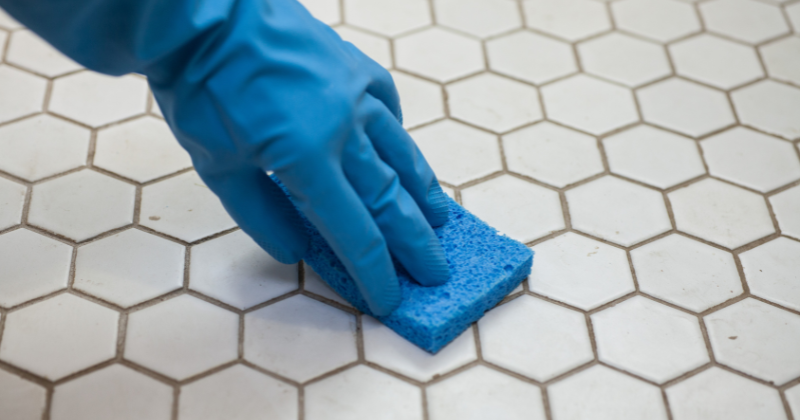
- Step 5: Cleaning and Finishing
- Wait a few minutes, then wipe off the extra grout with a damp sponge.
- Shape the grout lines with your sponge. You want them smooth.
- Let the grout dry for as long as the package says. Please don’t touch it!
- Once it’s dry, polish the tiles with a clean, dry cloth.
Advanced Tips and Tricks
Okay, so you’ve got the basics down.
Now, let’s talk about some tricks that can make your regrouting job even better.
- Dealing with Stubborn Stains: If you have old stains that won’t come out, try a special grout cleaner. Sometimes, you need to let it sit for a while before scrubbing.
- Preventing Future Problems: To keep your grout looking good, clean it regularly. Don’t use harsh chemicals, though. They can break down the grout.
- Color Matching: When you pick your new grout, try to match the color of your existing tile. You can also choose a new color to give your tiles a fresh look.
- Using Additives: Some people add special stuff to their grout to make it stronger or more water-resistant. This can be helpful in wet areas like showers.
- Avoiding Common Mistakes: Don’t rush! Take your time, and make sure you clean up the excess grout before it dries.
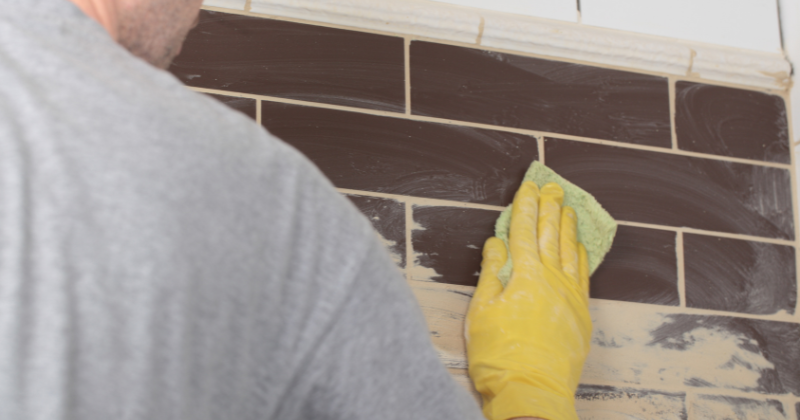
- Sealing for Longevity: After the grout dries, you need to seal it. This keeps water out and makes it easier to clean.
-
- Use a good-quality grout sealer.
- Apply it evenly, following the directions on the bottle.
- Choosing the Right Grout:
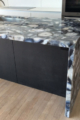
- If you are working with marble tiles, make sure to use grout designed for natural stone.
- Epoxy grout is a great choice for areas that get wet often, but it can be a bit more difficult to work with.
- Remember, porcelain is trending, so you will find many grout types that work well with that style of tile.
- Dealing with Problems:
- If you encounter loose grout after the process, you may need to apply a bit more grout sealer or remove the loose grout and reapply.
- When you are grouting, make sure you are using the correct grout removal tool to prevent damage to the surrounding tile.
Maintaining Your Regrouted Tile
You’ve done the hard part! Now, let’s discuss how to keep your regrouted tile looking great for years.
- Regular Cleaning: Wipe down your tiles and grout joints regularly. Use a mild soap and water. Avoid harsh chemicals or bleach, which can damage the grout.
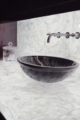
- Choose the Right Products: Look for cleaners made for tile and grout. They’ll keep your grout looking fresh without harming it. Be careful, especially if you have luxury stone or granite tile.
- Prevent Mold and Mildew: Keep your bathroom or kitchen well-ventilated. This helps prevent mold and mildew from growing in the grout.
- Inspect Regularly: Check your grout lines every few months. Look for cracks or damage. Catching problems early means easier fixes.
- Dealing with Hardened Grout: If you find bits of hardened grout on the tile surface, use a plastic scraper to remove them gently. Don’t use metal, as it can scratch the tiles.
- Getting all the old grout removed in the first place makes cleaning and maintenance much easier.
In Short
You did it! Regrouting your tile really makes a big difference. It can make a room look brand new.
You learned how to remove the old grout and put in fresh grout. Remember to seal it, as that keeps water out.
Now, your tiles look great. You saved money doing it yourself. And you learned a new skill. That’s awesome!
Think about how good your bathroom or kitchen looks now.
You can even use these skills with trendy new porcelain slabs or classic porcelain tiles.
Technology is always making new grouts and tools, so keeping up-to-date helps.
So, go ahead and show off your work. You did a great job! Share your regrouting stories with others.
Frequently Asked Questions
How long does grout take to dry?
Grout typically takes 24-48 hours to dry completely. However, humidity and temperature can affect drying time. Always check the grout manufacturer’s instructions for specific drying recommendations. Avoid getting the area wet during this period to ensure proper hardening.
Can I regrout over existing grout?
It’s generally not recommended to regrout over existing grout. Old grout can prevent the new grout from adhering properly, leading to cracking and failure. For a long-lasting result, it’s best to remove all the old grout before applying new grout.
How often should I regrout my tile?
The frequency of regrouting depends on the location and usage of the tile. In high-traffic or wet areas like showers, regrouting may be necessary every 8-10 years. In less demanding areas, it could last longer. Regular cleaning and maintenance can extend the lifespan of your grout.
What type of grout should I use?
The type of grout depends on the tile material and the width of the grout lines. Sanded grout is suitable for wider grout lines (1/8 inch or more), while unsanded grout is best for narrower lines. Epoxy grout is excellent for wet areas due to its water-resistant properties.
How do I remove grout haze?
Grout haze is a thin film left on the tile surface after grouting. To remove it, use a damp sponge and wipe the tiles in a circular motion. A mild acidic cleaner designed for grout haze removal may be needed for stubborn haze. Always follow the cleaner’s instructions.

Owner, Cavastone Group
With years of perseverance and pride in what we do we have become a very well known and positioned company in the Architectural and Design industry. The same perseverance, pride and attention to detail that made us become who we are, are the same qualities we strive to provide to all our customers.